Aging mahogany - Stratocaster guitar
Our next project is going to be using mahogany wood. I've been wanting to age out mahogany for a long time, but only had a few boards of it, and frankly, that is just boring. Instead, we are going to do a guitar body again. This has the advantage of showing you the curves, hard edges, flat surfaces and a more realistic view of what it will do. We are also going to test them in a new rig configuration, using the SG-1-40 lamps but instead of 32w to 40 watts, we will be pushing them at 60 watts each using a pair of Workhorse 8 ballasts (6 wires, 2 per lamps, so 3 lamps per ballast). This is a pretty standard High Output configuration, or HO mode. We are also going to start with a fresh set of lamps, since I am worn out the last set. Took 18 months to do it.
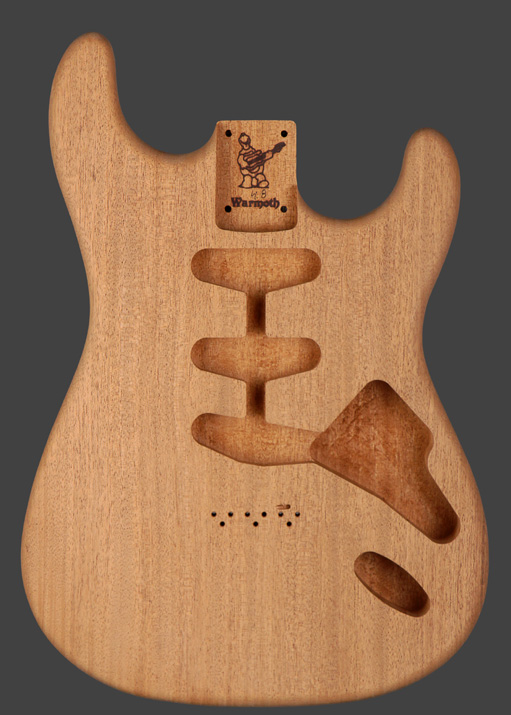
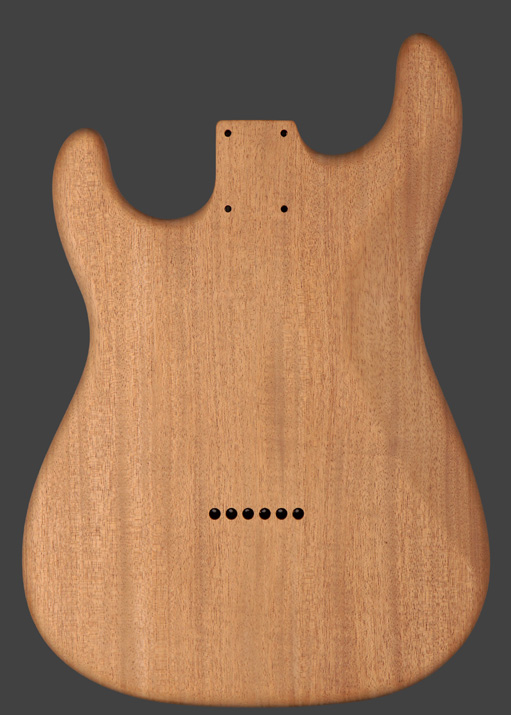
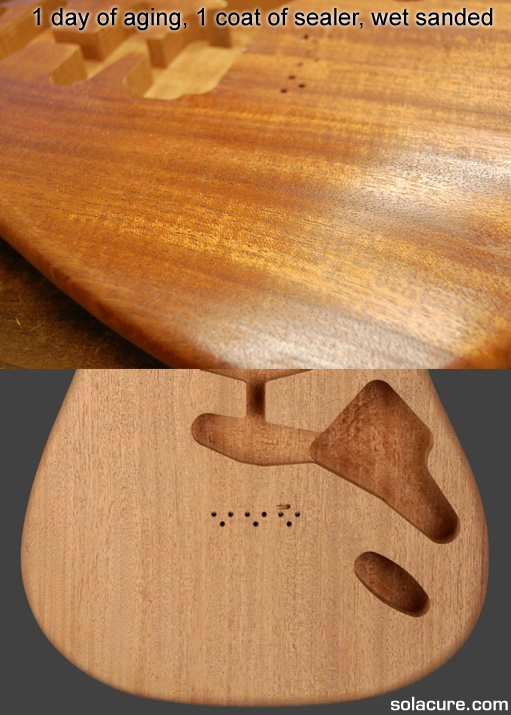
For the guitar body, we are going to take this body from Warmoth and get them to open up the back pickup route to accommodate a humbucker, but other than that, it will be exactly as shown. We will age it exactly as you see it with the goal of getting maximum darkness, and just see what happens. Warmoth is a licenced Fender replacement parts builder, and known to be one of the best, if not the best, for quality. this is a two piece body, bookmatched. This means they saw the thick board in half and lay it over so the grain matches and it looks like one piece. This is a good theory, but doesn't always work out. This guitar, however, matches perfectly and you can't even see the line where the two pieces meet. As I wanted an exceptionally high quality piece of mahogany to work with, I'm pretty happy with my choice. The blank as shown comes in well under 5 pounds in weight, so is lighter than average for mahogany and very manageable for a musical instrument.
 Technical Specifications:(subject to change)
Warmoth "hardtail" Stratocaster body, HSS configuration, 2 piece mahogany.
WD Strat neck, rosewood over maple, 22 frets, Tusq XL nut, 1 11/16th width
Fender Custom Shop Texas Special pickup set (3)
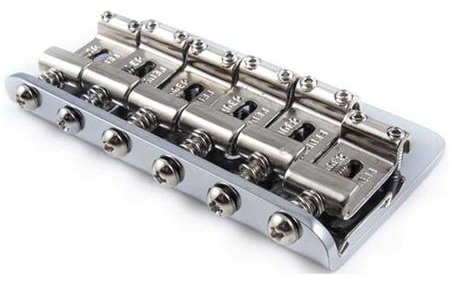
Fender vintage hardtail bridge (Fender stamped) with 10.8mm string spacing
Fender pots, 5x switch, and pickguard. Modified wiring to single tone.
All parts are made in the USA except maybe a few screws or misc.
Finish materials:
Solarez UV cure wood sealer
Solarez urethane "rock hard" UV cure finish.
Solacure SG-1-40 curing lights
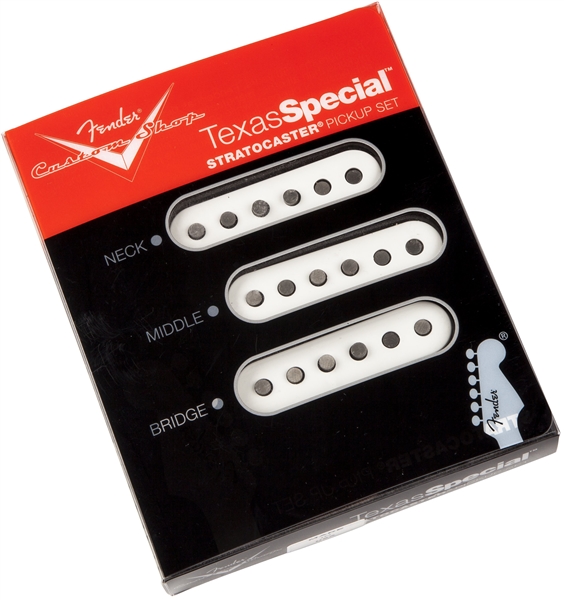
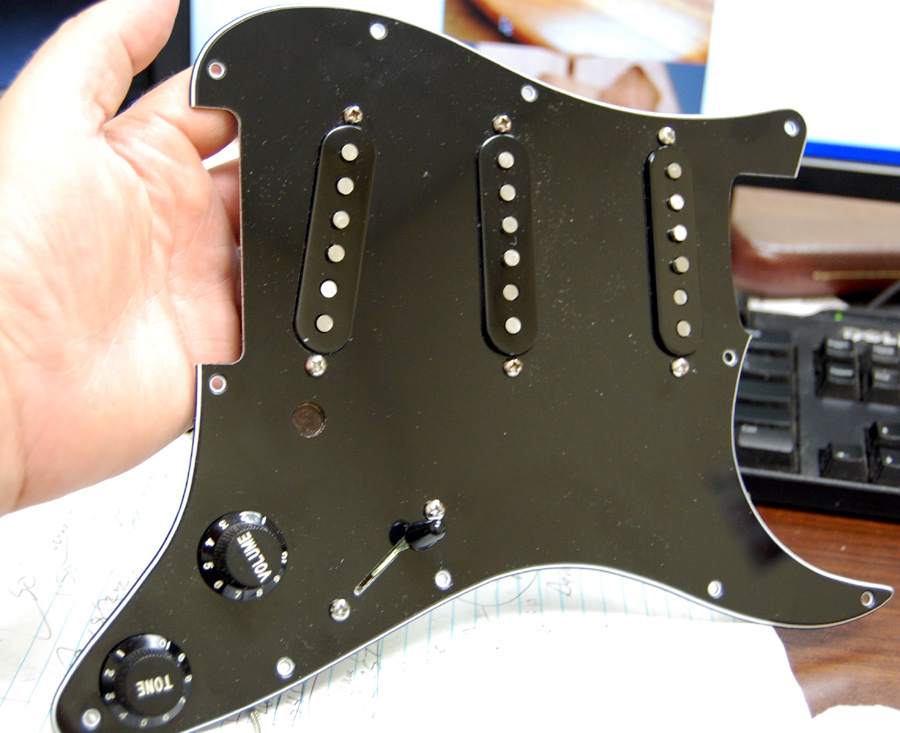 I don't usually buy preloaded pickguards, I build my own out. This one has the Texas Specials with Fender black covers that bought, CTS pots and Fender 5x blade. Pretty standard except I leave the first hole empty and use a single volume and single tone only. My knuckles tend to smack the volume knob when play, as I play way back on the bridge.
This has nothing to do with the wood, of course, but I decided a completely black pickguard system will draw more attention to the wood, which is the goal. I might even use black screws in the pickguard, something I do regularly.
Built a quick stand for the guitar. This will make putting on the final coat easier, as well as aging it. I still haven't finished my 4 sided rig (I know...) but I should be able to do a good job with the rig I have by turning it on its side. This is after a couple of days of aging in the high powered rig. Definitely makes a difference going from 32 to 60 watts.
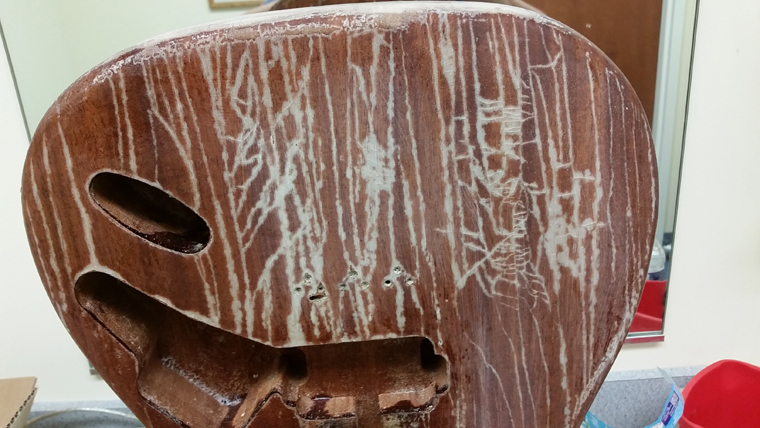 Sometimes, things go horribly wrong. This is one of those times. I had put one coat of UV cure resin on the guitar, and then I decided to put a coat of lacquer over the UV resin. Not a good idea. It started to buckle and crack a little. Dang. So I tried to remove the nitrocellulose lacquer using lacquer thinner, hoping to salvage the under coat. Not a chance. Instead it went FUBAR and started cracking and crazing, just getting worse with everything I tried. This is where I remind you that I'm an expert on UV, not on finishing guitars.
I tried every kind of reducer and stripper known to man. I even tried a heat gun. In short, I've had the reverse Midas touch since touching the lacquer. So now I begin the task of sanding it down, manually, which probably means sanding through the oxidation in some areas, so I will have to re-age the guitar. Once I get it back to raw wood, I'm not worried, but getting it there will take some effort.
I picked up some nice red stain (because I can't just leave well enough alone...) and it may be getting a coat of that, for the old Gibson "vintage cherry on mahogany" look, then I'm not sure what I will put over the stain yet. This story isn't over, and frankly, I really did expect serious mistakes like this because I am new to finishing guitars. If you are reading this, you've probably done similar, so you can relate. I may get some extra mileage here and get to test several different things. This was weeks ago, so I'm finally at the point that I can laugh about it. Stuff happens, live and learn. More to come....
For the guitar body, we are going to take this body from Warmoth and get them to open up the back pickup route to accommodate a humbucker, but other than that, it will be exactly as shown. We will age it exactly as you see it with the goal of getting maximum darkness, and just see what happens. Warmoth is a licenced Fender replacement parts builder, and known to be one of the best, if not the best, for quality. this is a two piece body, bookmatched. This means they saw the thick board in half and lay it over so the grain matches and it looks like one piece. This is a good theory, but doesn't always work out. This guitar, however, matches perfectly and you can't even see the line where the two pieces meet. As I wanted an exceptionally high quality piece of mahogany to work with, I'm pretty happy with my choice. The blank as shown comes in well under 5 pounds in weight, so is lighter than average for mahogany and very manageable for a musical instrument.


 Technical Specifications:(subject to change)
Warmoth "hardtail" Stratocaster body, HSS configuration, 2 piece mahogany.
WD Strat neck, rosewood over maple, 22 frets, Tusq XL nut, 1 11/16th width
Fender Custom Shop Texas Special pickup set (3)
Fender vintage hardtail bridge (Fender stamped) with 10.8mm string spacing
Fender pots, 5x switch, and pickguard. Modified wiring to single tone.
All parts are made in the USA except maybe a few screws or misc.
Finish materials:
Solarez UV cure wood sealer
Solarez urethane "rock hard" UV cure finish.
Solacure SG-1-40 curing lights

Update
I sanded it down, wet it to expose the tiny fibers, let it dry, then sanded it again. It wasn't enough. I let it age one day in the main UV light rig, then using a buffing pad to clean it up and put on a medium coat of sealer. The tiny fibers still soaked it up, but that is fine. After curing the seal (Solarez's UV cure sealer), I wet sanded the whole thing and now starting to age it some more. I will likely repeat with a thin layer of sealer and some more wet sanding before starting the finishing process. After just a day of aging, you can see a moderate difference. The finish itself makes it look wet, but the aging make it look more of a caramel color, and more is yet to come.
 I don't usually buy preloaded pickguards, I build my own out. This one has the Texas Specials with Fender black covers that bought, CTS pots and Fender 5x blade. Pretty standard except I leave the first hole empty and use a single volume and single tone only. My knuckles tend to smack the volume knob when play, as I play way back on the bridge.
This has nothing to do with the wood, of course, but I decided a completely black pickguard system will draw more attention to the wood, which is the goal. I might even use black screws in the pickguard, something I do regularly.
3rd update


Built a quick stand for the guitar. This will make putting on the final coat easier, as well as aging it. I still haven't finished my 4 sided rig (I know...) but I should be able to do a good job with the rig I have by turning it on its side. This is after a couple of days of aging in the high powered rig. Definitely makes a difference going from 32 to 60 watts.
Don't laugh....
 Sometimes, things go horribly wrong. This is one of those times. I had put one coat of UV cure resin on the guitar, and then I decided to put a coat of lacquer over the UV resin. Not a good idea. It started to buckle and crack a little. Dang. So I tried to remove the nitrocellulose lacquer using lacquer thinner, hoping to salvage the under coat. Not a chance. Instead it went FUBAR and started cracking and crazing, just getting worse with everything I tried. This is where I remind you that I'm an expert on UV, not on finishing guitars.
I tried every kind of reducer and stripper known to man. I even tried a heat gun. In short, I've had the reverse Midas touch since touching the lacquer. So now I begin the task of sanding it down, manually, which probably means sanding through the oxidation in some areas, so I will have to re-age the guitar. Once I get it back to raw wood, I'm not worried, but getting it there will take some effort.
I picked up some nice red stain (because I can't just leave well enough alone...) and it may be getting a coat of that, for the old Gibson "vintage cherry on mahogany" look, then I'm not sure what I will put over the stain yet. This story isn't over, and frankly, I really did expect serious mistakes like this because I am new to finishing guitars. If you are reading this, you've probably done similar, so you can relate. I may get some extra mileage here and get to test several different things. This was weeks ago, so I'm finally at the point that I can laugh about it. Stuff happens, live and learn. More to come....
| Solacure Means Quality Solacure ultraviolet lamps aren't just good, we guarantee they are the best or we will give you your money back. Our patented glass is more transparent to UVA and UVB. Our custom cathode/anode sets lets you run 2 to 3 times more power than a standard lamp in the same size. All of our lamps have built in reflectors. We have a lamp for every need. We stand behind everything we sell and guarantee each will perform exactly to specification, or we will replace them. We don't want your business this week, we want it every week, and we are willing to earn it. There really is a difference in quality when it comes to ultraviolet bulbs, and Solacure tops the list. Order online, over the phone, or call us if you need a custom UV lamp made, with fairly low minimums (around 2000 pieces). We can make it happen. Buy with confidence: We like what we do, and we've been doing it for over 30 years. |
 Got a question? The best way is usually to email us at sales@solacure.com. |
