Mark C's rig (different Mark)
Two different customers named Mark have submitted design ideas, this one is for smaller items. A customer, Mark C. built this rig for photography use. Contact printing that requires perfectly even amounts of UV. I won't pretend to fully understand, but I can easy see he did a great job here. This type of rig would be perfect for any flat surfact curing, 18" x 18" photography, or small parts. He really took his time to make it a quality product, knowing he would be using it for years to come. Here are the basic specs for the rig:
1x Workhorse 8 ballast
6x Solacure SG-1-20 bulbs
This puts them in STANDARD MODE. Not super high output, but even output that is cool running and it makes the lamps last a super long time. You get around 17 watts per bulb. You can double the ballasts and run it at around 27-30w for VHO operation without a lot of effort.
By the way, CLICK ON ANY PICTURE to have it open up a full sized image in a new window. This lets you experience the full detail.
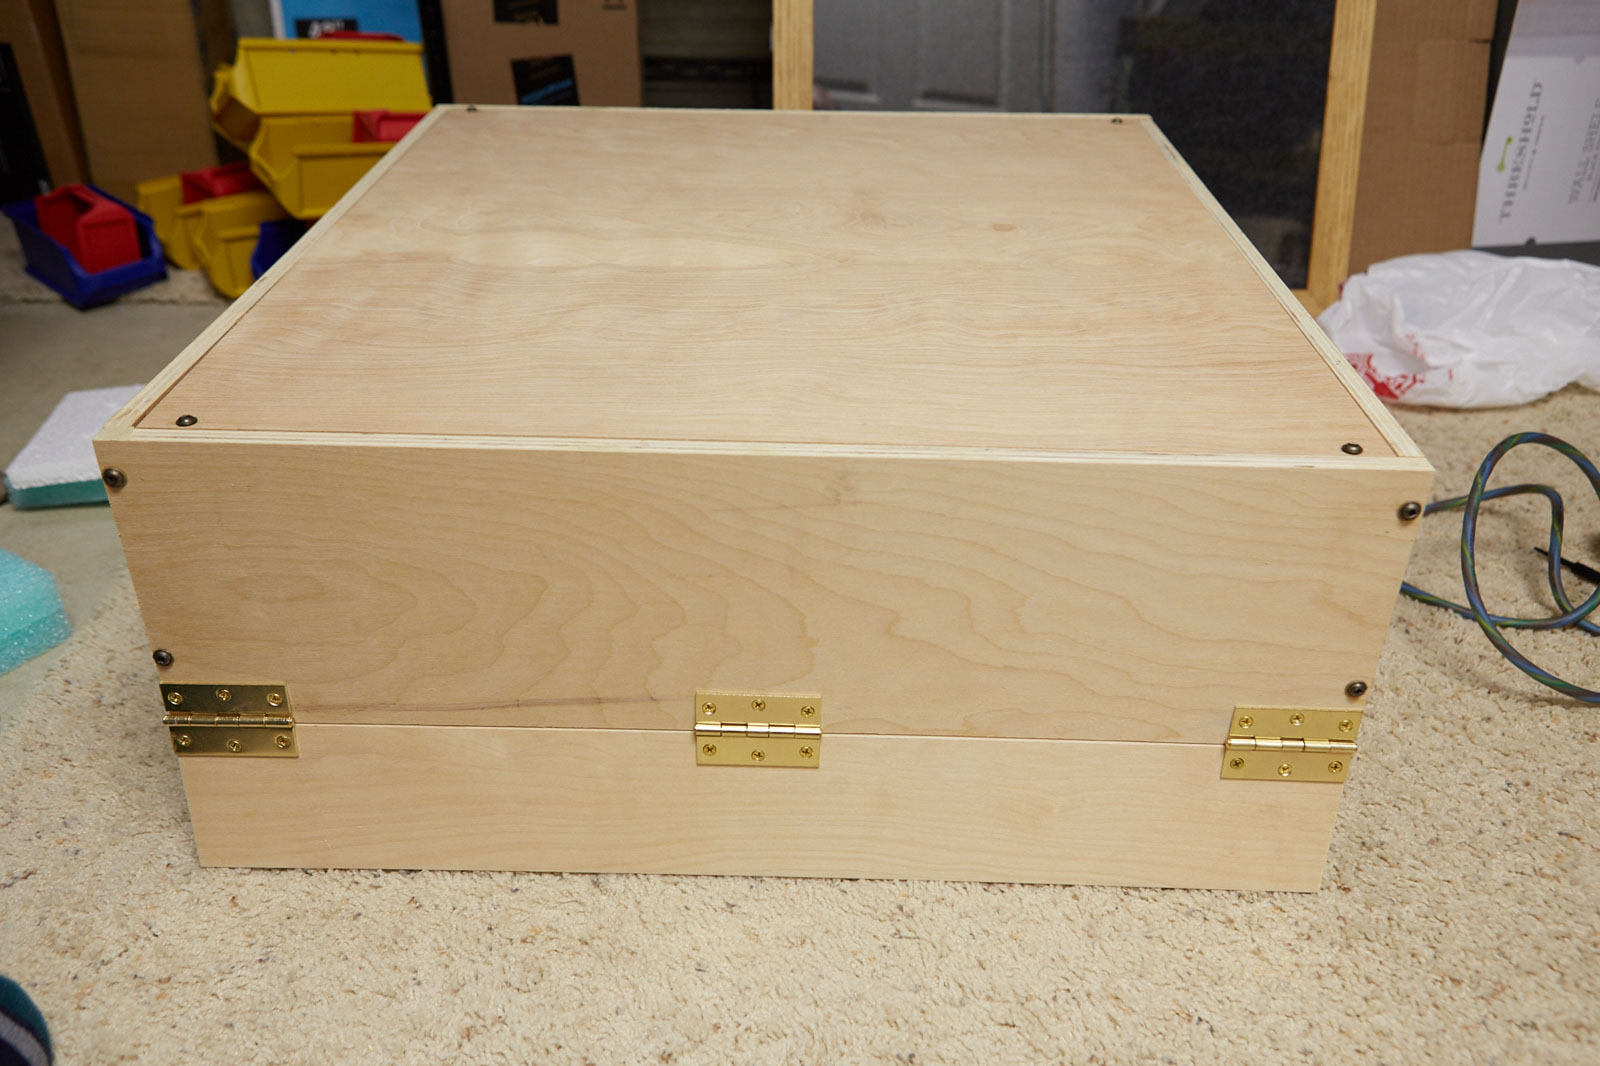
The first image is the front. You can see he uses three medium duty hinges to open and close the box. This is good because they are probably overrated for the job, so they will never wear out, but it also shields you from the UV when the box is energized. He also used nice thin plywood. I tend to use a lot of OSB, but I have to build a lot of projects and it is easy and cheap. If you have the skills, plywood is always best.
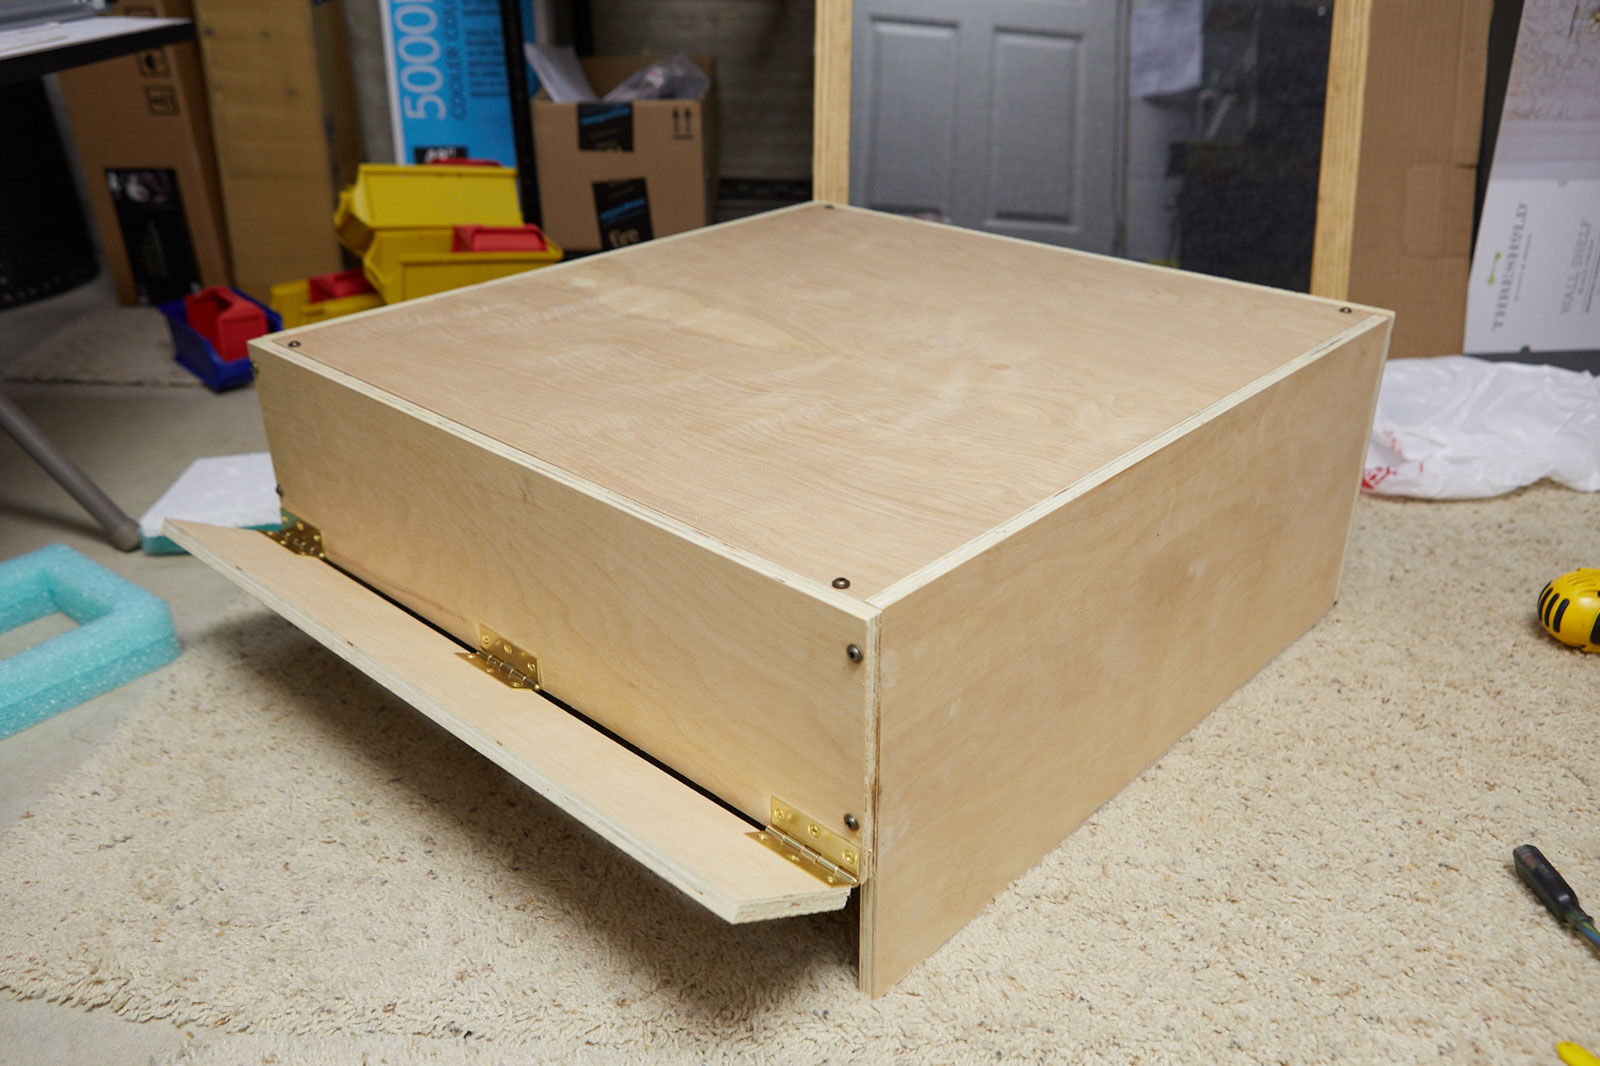
The second shot shows the door open. I'm guessing he has the hinges offset, so they stick a bit. You wouldn't want that on a door but it works perfect for an application like this. The box is open on the bottom. There really is no need to have a bottom board, and this allows you to use it on any flat surface.
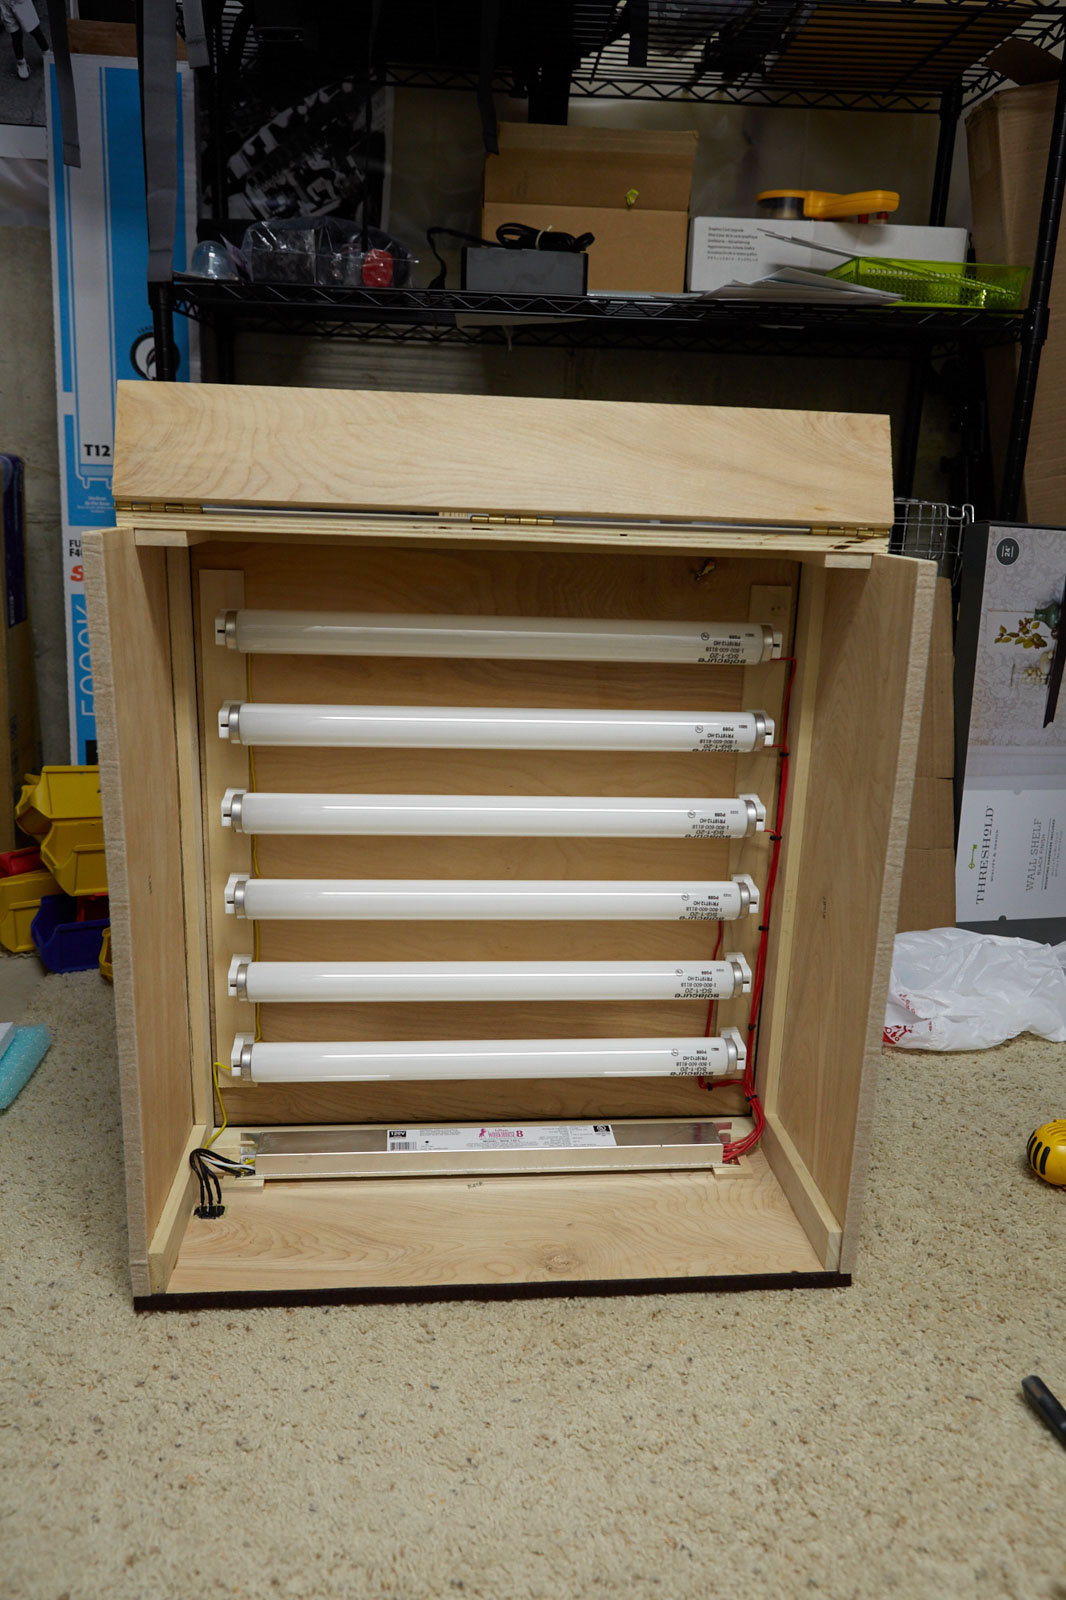
This 3rd shot is the money shot. Here you see several important facts. He chose to put the ballast inside the box, which is fine for most applications where you aren't running the lamps for many hours on end. Next, you can see he added a 1 inch wide by half inch thick board for mounting the lamp ends / lamp holders. This serves many purposes. It puts more room over the lamps for heat disipation, and lets you use a longer screw for mounting the lamp ends themselves. He has perfect lamp spacing as well, as the space between the lamps is LESS THAN the distance from the lamps to the photo plate. This insures even exposure.
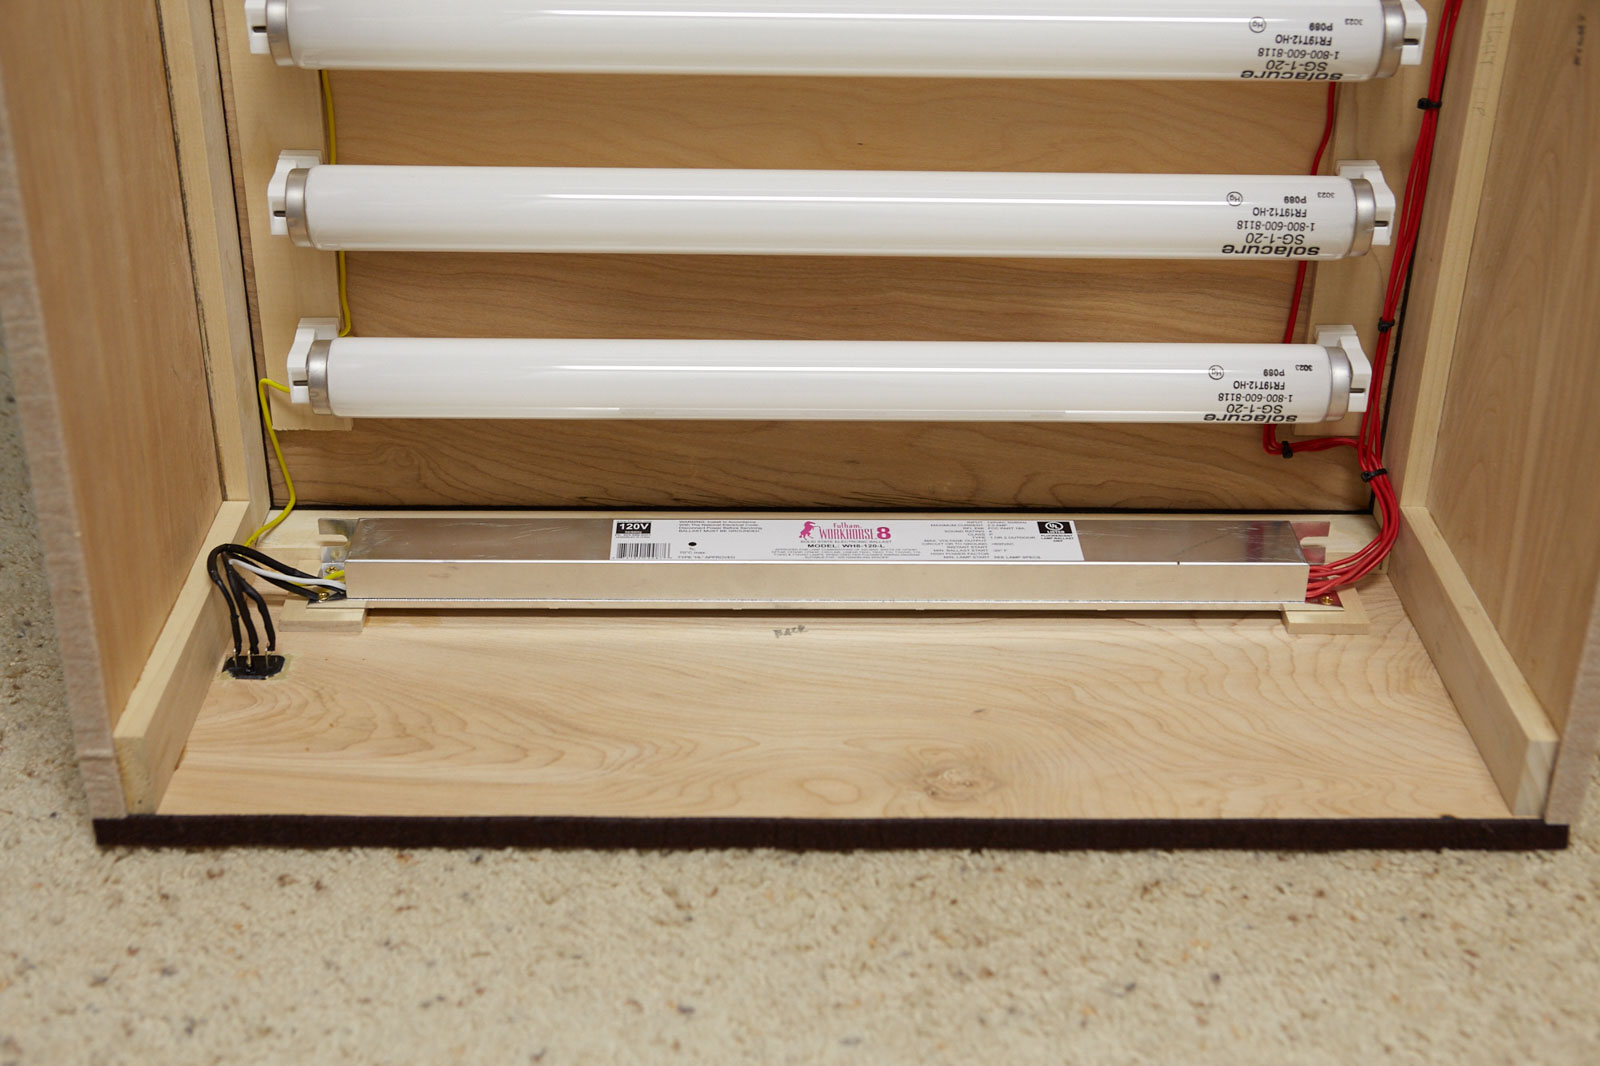
This next shot, it might be hard to see, but I can tell that he wired the ballast to a male plug so he could use a standard computer plug on the outside of the box. Nice touch. We used similar male / female type plugs, the same dimension as a computer plug, when connecting the top and bottom halves of tanning beds to the control box. It makes a good connection and the parts are easy to find.
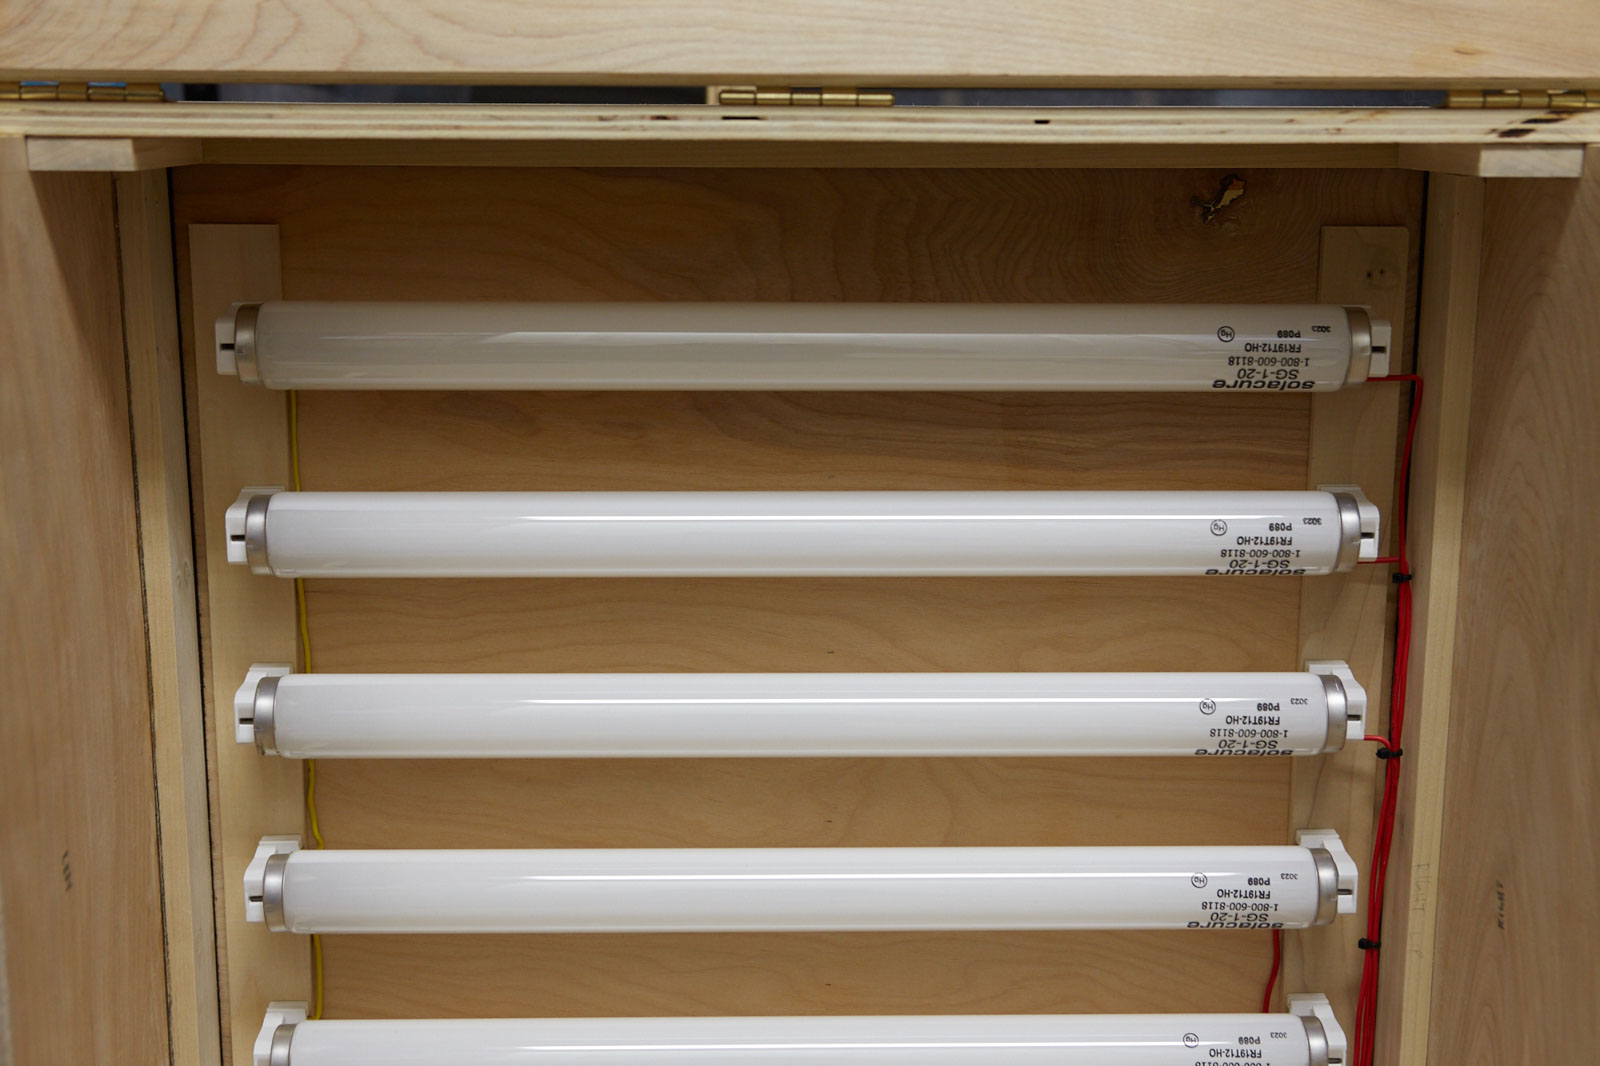
You can see that he did a fantastic job routing the wires. Really nice, clean job that puts me to shame. Wire ties are always a good idea. They help keep the wires out of the way. In this case, on the left, he is just "daisy chaining" the yellow wires: short wires that jump from lamp end to lamp end until they get to the last one, which is connected to the yellow wire on the ballast. The red wires are just one per lamp. Very easy wiring configuration.
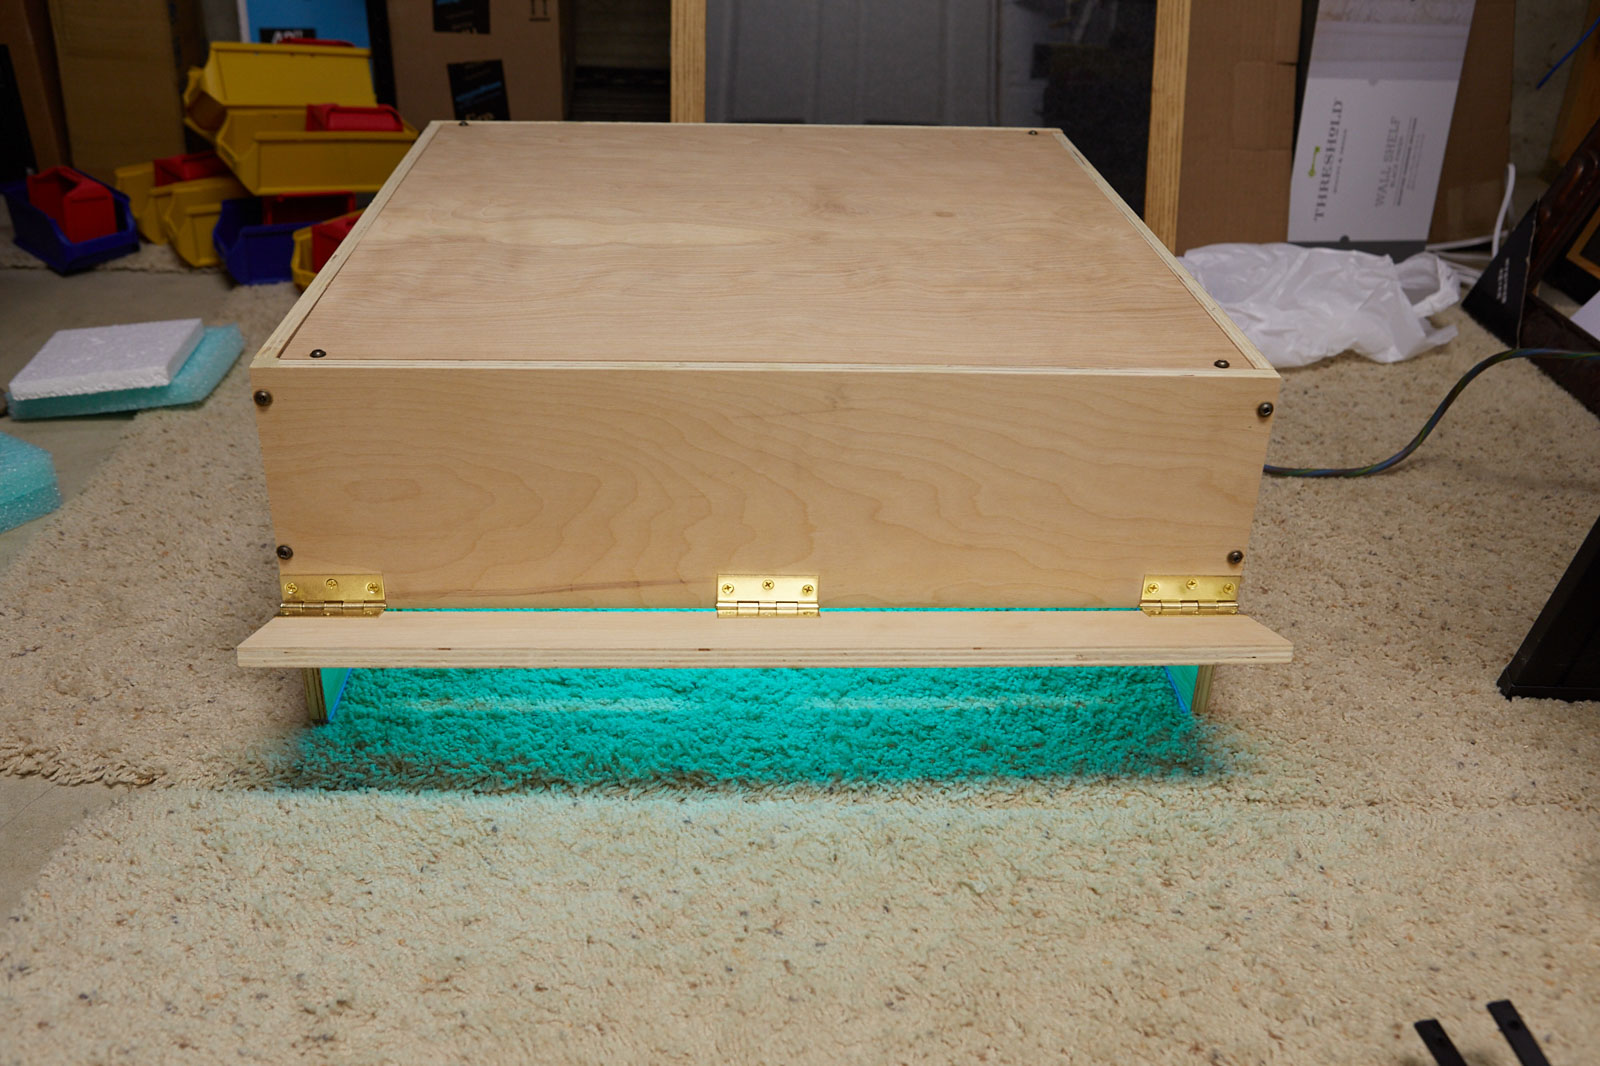
Finally, you see the box when it is energized. All SG-1 lamps that unusual green color to them. This is due to the phosphor blend we use, but it is actually helpful as there is no doubt when you have the power on. He has it on carpet here, although I'm confident it will actually be used on a table top, a hard surface that makes loading and unloading a very simple thing to do.
Thanks to Mark for allowing me to share these photos with you. The goal is to help others who want to do unusual projects, and there is no better way than to show you what our customers are doing. Of course, your rig is probably going to be a little different, but we hope this gives you some ideas to help you realized your goals.
Dennis Brown
1x Workhorse 8 ballast
6x Solacure SG-1-20 bulbs
This puts them in STANDARD MODE. Not super high output, but even output that is cool running and it makes the lamps last a super long time. You get around 17 watts per bulb. You can double the ballasts and run it at around 27-30w for VHO operation without a lot of effort.
By the way, CLICK ON ANY PICTURE to have it open up a full sized image in a new window. This lets you experience the full detail.

The first image is the front. You can see he uses three medium duty hinges to open and close the box. This is good because they are probably overrated for the job, so they will never wear out, but it also shields you from the UV when the box is energized. He also used nice thin plywood. I tend to use a lot of OSB, but I have to build a lot of projects and it is easy and cheap. If you have the skills, plywood is always best.

The second shot shows the door open. I'm guessing he has the hinges offset, so they stick a bit. You wouldn't want that on a door but it works perfect for an application like this. The box is open on the bottom. There really is no need to have a bottom board, and this allows you to use it on any flat surface.

This 3rd shot is the money shot. Here you see several important facts. He chose to put the ballast inside the box, which is fine for most applications where you aren't running the lamps for many hours on end. Next, you can see he added a 1 inch wide by half inch thick board for mounting the lamp ends / lamp holders. This serves many purposes. It puts more room over the lamps for heat disipation, and lets you use a longer screw for mounting the lamp ends themselves. He has perfect lamp spacing as well, as the space between the lamps is LESS THAN the distance from the lamps to the photo plate. This insures even exposure.

This next shot, it might be hard to see, but I can tell that he wired the ballast to a male plug so he could use a standard computer plug on the outside of the box. Nice touch. We used similar male / female type plugs, the same dimension as a computer plug, when connecting the top and bottom halves of tanning beds to the control box. It makes a good connection and the parts are easy to find.

You can see that he did a fantastic job routing the wires. Really nice, clean job that puts me to shame. Wire ties are always a good idea. They help keep the wires out of the way. In this case, on the left, he is just "daisy chaining" the yellow wires: short wires that jump from lamp end to lamp end until they get to the last one, which is connected to the yellow wire on the ballast. The red wires are just one per lamp. Very easy wiring configuration.

Finally, you see the box when it is energized. All SG-1 lamps that unusual green color to them. This is due to the phosphor blend we use, but it is actually helpful as there is no doubt when you have the power on. He has it on carpet here, although I'm confident it will actually be used on a table top, a hard surface that makes loading and unloading a very simple thing to do.
Thanks to Mark for allowing me to share these photos with you. The goal is to help others who want to do unusual projects, and there is no better way than to show you what our customers are doing. Of course, your rig is probably going to be a little different, but we hope this gives you some ideas to help you realized your goals.
Dennis Brown
| Solacure Means Quality Solacure ultraviolet lamps aren't just good, we guarantee they are the best or we will give you your money back. Our patented glass is more transparent to UVA and UVB. Our custom cathode/anode sets lets you run 2 to 3 times more power than a standard lamp in the same size. All of our lamps have built in reflectors. We have a lamp for every need. We stand behind everything we sell and guarantee each will perform exactly to specification, or we will replace them. We don't want your business this week, we want it every week, and we are willing to earn it. There really is a difference in quality when it comes to ultraviolet bulbs, and Solacure tops the list. Order online, over the phone, or call us if you need a custom UV lamp made, with fairly low minimums (around 2000 pieces). We can make it happen. Buy with confidence: We like what we do, and we've been doing it for over 30 years. |
 Got a question? The best way is usually to email us at sales@solacure.com. |
